


Gone are the days when professional photography was limited to expensive cameras. With the advancements in smartphone technology, your iPhone is now a powerful tool for capturing stunning, high-quality photos. Whether you're a beginner or an experienced photographer, knowing a few key techniques can significantly enhance your iPhone photography skills. This guide provides deep yet simple insights into how to take professional-quality photos using your iPhone.
1. Clean Your Lens for Crisp Shots
One of the simplest yet most overlooked steps in photography is ensuring your camera lens is clean. Since your iPhone is often in your pocket or bag, the lens can accumulate dust, fingerprints, or smudges, which can blur your photos. Before taking a picture, wipe the lens gently with a microfiber cloth for clear and sharp images.
2. Use the Grid for Better Composition
Composition is key to creating visually appealing photos. The "Rule of Thirds" is a fundamental guideline where the frame is divided into nine equal parts using two horizontal and two vertical lines. Placing your subject along these lines or at their intersections creates a balanced and aesthetically pleasing composition.
To enable the grid on your iPhone:
- Open Settings
- Scroll down and tap Camera
- Toggle on Grid
This will help you align your shots and improve composition effortlessly.
3. Adjust Focus and Exposure Manually
Your iPhone's automatic settings work well, but manual adjustments can significantly improve your photos. To set focus and exposure manually:
- Open the Camera app.
- Tap on the part of the screen where you want to focus.
- Drag the sun icon up or down to adjust brightness.
- To lock focus and exposure, tap and hold until "AE/AF Lock" appears.
This feature is especially useful in challenging lighting conditions or when capturing moving subjects.
4. Take Advantage of Natural Light
Lighting is one of the most critical aspects of photography. Natural light enhances colors and details, making your photos look more professional. The best times to shoot are during the golden hours—shortly after sunrise and before sunset—when the light is soft and warm.
Pro Tip: Avoid using the flash unless necessary, as it can create harsh shadows and unnatural colors.

Bonus Tip: You can use the Photo Expert app to check the exact Golden Hour and Blue Hour times in your location and plan your shots accordingly.
5. Experiment with Different Angles and Perspectives
Instead of shooting at eye level all the time, try different perspectives to add depth and uniqueness to your photos. Some creative angles include:
- Low-angle shots: Make your subject appear more dynamic.
- Overhead shots: Great for food photography and flat lays.
-
Side angles: Capture unique lighting and perspectives.
6. Avoid Digital Zoom
Digital zoom essentially crops and enlarges your photo while shooting, leading to a significant loss in image quality. This process stretches existing pixels, resulting in:
- Grainy appearance
- Loss of detail
- Reduced sharpness
- Visible pixelation
Better Alternatives to Digital Zoom:
- Physical Positioning: Move closer to your subject when possible, find creative angles that don't require zoom, and use leading lines to create depth.
-
Post-Processing Solutions: Crop photos afterward using editing apps while maintaining original resolution. This allows you to control the exact composition.

Pro Tip: If you absolutely must zoom, invest in external iPhone camera lenses that provide true optical zoom capabilities without compromising image quality.
For situations where you can't get closer to your subject, consider:
- Using the telephoto lens (available on newer iPhone models)
- Shooting in RAW format for better editing flexibility
- Planning your shot composition before taking the photo
7. Keep Your Hands Steady
Blurry photos can ruin an otherwise great shot, but achieving crystal-clear images is possible with proper handling techniques. Here's how to maintain stability while shooting:
Essential Stability Techniques
- Hold your iPhone with both hands in a firm grip, keeping your elbows close to your body
- Use your thumbs and index fingers to create a stable platform
- Keep your feet shoulder-width apart for better balance
- Lean against a wall or stable surface when possible
Camera Controls for Stability
- Use the volume buttons as a shutter release to minimize movement
- Activate the timer function (3 or 10 seconds) for hands-free shooting
- Enable the grid feature to help maintain level shots
- Use the burst mode by holding down the shutter button to increase chances of sharp captures
Advanced Stability Solutions
For challenging shooting conditions:
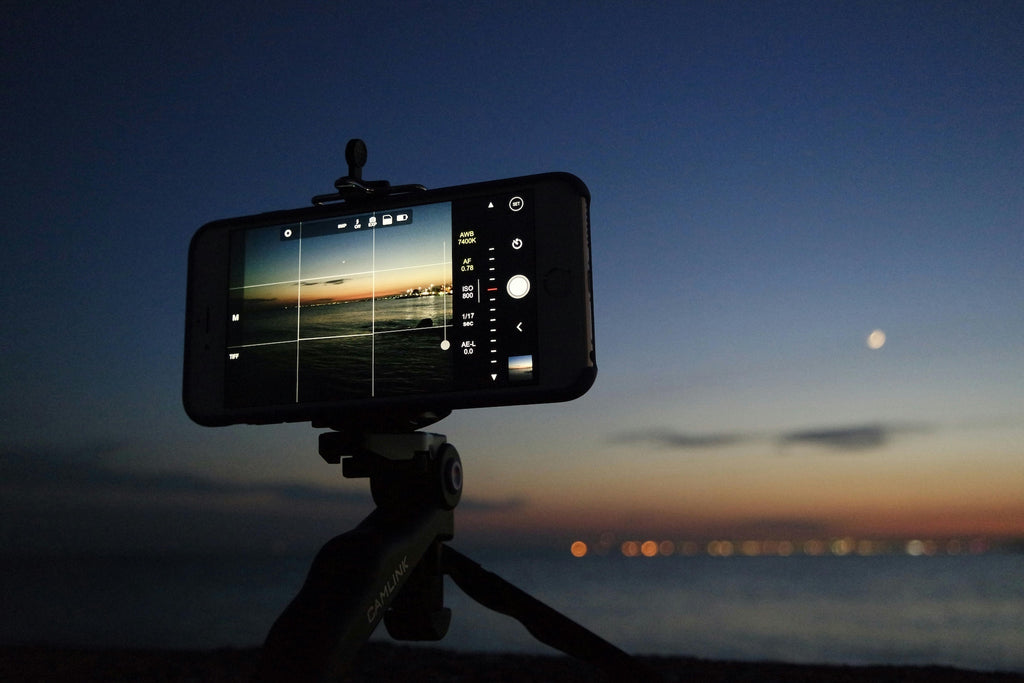
Invest in a smartphone tripod for:
- Low-light photography
- Long exposure shots
- Time-lapse videos
- Self-portraits
Consider using a stabilizing gimbal for:
- Walking shots
- Action sequences
8. Utilize HDR Mode for Balanced Exposure
HDR (High Dynamic Range) helps balance the exposure between the brightest and darkest areas of a scene, making it ideal for capturing high-contrast settings such as landscapes and backlit subjects.

To enable HDR:
- Open the Camera app.
- Tap HDR at the top of the screen.
- Select Auto or On to ensure a more balanced image.
9. Edit Your Photos for a Professional Look
Editing plays a crucial role in professional photography. The iPhone’s built-in editing tools allow you to adjust brightness, contrast, and saturation. However, for more advanced editing, using third-party apps can make a significant difference.
Built-in Editing Tools
The iPhone's default editing features provide essential adjustments:
- Exposure and Brilliance: Fine-tune the overall brightness and add depth
- Highlights and Shadows: Recover details in bright and dark areas
- Warmth and Tint: Adjust color temperature for more natural-looking images
- Definition and Sharpness: Enhance image clarity and crispness
- Noise Reduction: Minimize graininess in low-light photos
Pro Editing Tips
- Start with Basic Adjustments: Begin with exposure and contrast before moving to advanced tools
- Use Selective Editing: Focus on specific areas rather than applying global adjustments
- Maintain Consistency: Develop a signature editing style for your photo series
- Save Versions: Keep original copies before making significant edits
10. Shoot in RAW for Better Editing Control
RAW format preserves all the data captured by your iPhone's sensor, providing uncompressed image files that retain crucial details in highlights and shadows. Unlike JPEG files, which automatically compress and process images, RAW files give you complete control over:
- White balance adjustments
- Shadow recovery
- Highlight preservation
- Color correction
- Exposure modifications
While JPEG files typically range from 3-5MB, RAW files can be 20-30MB.
Pro Tip: When shooting in RAW, ensure you have sufficient storage space on your device, as these files can quickly fill up your memory.
Remember: While RAW files offer superior editing flexibility, they require post-processing to look their best, unlike JPEG files which are ready to share immediately after capture.
Elevate Your Photography with the Snap Pro Camera App
Now that you've mastered the fundamentals of iPhone photography, taking your skills to the next level is easier with the Snap Pro Camera app. Designed for photographers of all levels, this app provides powerful tools that make capturing professional-quality images effortless.

Here’s how it helps:
- Manual Controls: Adjust shutter speed, ISO, and white balance for precise shots.
- RAW Capture: Shoot in RAW format for high-quality post-processing.
- Instant Color Grading & Filters: Apply professional-grade filters and color grading in real-time.
- Advanced Photography Modes: Enjoy features like motion blur, light trails, and long exposure for creative photography.
- Background Removal & Replacement: Seamlessly remove or change backgrounds to create stunning portraits and product photos.
- Object Removal Tool: Easily remove unwanted objects or distractions from your shots.
- Cinematic Video Stabilization: Capture smooth and professional-looking videos without the need for additional equipment.
- AI-Powered Enhancements: Improve the quality of your photos with AI-driven adjustments for lighting, sharpness, and detail.
- Pro-Level Portrait Mode: Enhance portraits with adjustable bokeh and skin-smoothing features.
Conclusion
Taking professional photos with your iPhone is easier than ever with the right techniques and tools. By mastering composition, lighting, and manual controls, you can capture stunning images effortlessly. Pairing your iPhone with Snap Pro Camera further enhances your photography experience, making professional-grade photography accessible to everyone.
So, grab your iPhone, apply these techniques, and see how Snap Pro Camera helps bring your vision to life with ease!
FAQs (Frequently Asked Questions)
What accessories can enhance my iPhone photography experience?
Consider investing in accessories such as a tripod for stability, lens attachments for varied perspectives, external lighting kits for better illumination, and a portable charger to ensure your device remains powered during extended shoots.
What are the benefits of shooting in RAW format on my iPhone?
Shooting in RAW format allows you to capture all the data from your iPhone's camera sensor, providing greater flexibility in post-processing. This means you can make more significant adjustments to exposure, color balance, and details without losing quality, making it ideal for professional-quality images.
How can I effectively use natural light to enhance my iPhone photography?
To make the most of natural light, shoot during the golden hour—shortly after sunrise or before sunset—when the light is soft and warm. Position your subject to face the light source for better illumination and avoid harsh shadows. Experiment with backlighting for creative effects.
What techniques can I use to achieve better stability when taking photos with my iPhone?
To improve stability, hold your iPhone with both hands and keep your elbows close to your body. Use a tripod or a stabilizer for challenging conditions, and consider using the volume buttons as a shutter release to minimize camera shake. Practicing deep breathing can also help steady your hands.
How can I use the grid feature on my iPhone to improve photo composition?
Enabling the grid feature on your iPhone helps you apply the rule of thirds, a fundamental principle of photography composition. By aligning key elements of your shot along the grid lines or at their intersections, you can create more balanced and visually appealing photos.
What are some common mistakes to avoid when taking photos with my iPhone?
Common mistakes include neglecting to clean your lens, relying too heavily on digital zoom instead of moving closer, and not adjusting focus and exposure manually. Avoiding these pitfalls can significantly improve your photo quality.
How can I make the most of my iPhone's editing features after taking a photo?
To maximize your iPhone's editing capabilities, start with basic adjustments like exposure and contrast. Utilize built-in tools for cropping and filtering, and consider using advanced editing apps for more control over details.
How can experimenting with angles improve my iPhone photography?
Experimenting with different angles and perspectives can add depth and interest to your photos. Shooting from above, below, or at unusual angles can help you capture unique compositions that stand out.