


Capturing star trails is an exciting way to showcase the movement of the stars across the night sky, creating stunning, ethereal images. Whether you are a beginner or an experienced photographer, this guide will help you master the technique of long exposure photography for star trails.
1. Choose the Right Location
The key to capturing beautiful star trails is finding a dark location away from city lights. Light pollution can wash out the stars and make them less visible in your photos. Consider using Photo Expert to find the best dark sky locations, access a Light Pollution Map, and track Moon and Sun events for optimal shooting conditions.
Best Places for Star Trails:
-
National parks and remote areas
-
High-altitude locations with clear skies
-
Dark sky reserves and observatories

2. Plan Your Shoot
Proper planning ensures you capture the best star trails.
Best Conditions:
-
Clear Skies: Check weather forecasts and avoid cloudy nights.
-
Moon Phases: A new moon or a crescent moon is ideal, as bright moonlight can overpower star trails.
-
Time of Year: Winter months often have clearer skies, but star trails can be captured year-round.
3. Essential Gear for Star Trails Photography
For DSLR and Mirrorless Cameras:
-
Camera: A DSLR or mirrorless camera with manual settings.
-
Wide-Angle Lens: Preferably f/2.8 or faster to capture more light.
-
Sturdy Tripod: Essential to avoid camera movement.
-
Remote Shutter Release or Intervalometer: Allows long exposures without touching the camera.
-
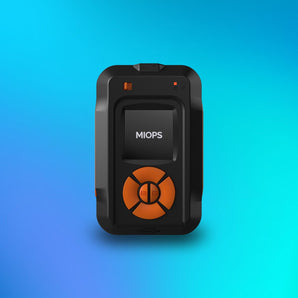
MIOPS Smart+ – A smart camera trigger to automate long exposures and interval shooting.
For iPhone Users:
-
Snap Pro Camera App – Allows manual exposure control and long shutter speeds.
-
Tripod with Phone Mount: Essential for stability.

4. Camera Settings for Star Trails
For DSLR and Mirrorless Cameras:
-
Mode: Manual (M)
-
Aperture: f/2.8 – f/5.6 for optimal light intake.
-
ISO: 800 – 3200 (adjust based on light conditions).
-
Shutter Speed: 30 seconds per exposure (use Bulb Mode for longer exposures).
-
White Balance: 4000K – 5000K for a natural look.
-
Focus: Set to infinity and manually adjust for sharp stars.
For iPhone Users (Using Snap Pro Camera App):
-
Use Long Exposure Mode
-
ISO 400-1600 to balance noise and brightness.
-
Shutter Speed: Set to 15-30 seconds (or use time-lapse stacking).
-
Lock Focus to Infinity
-
Shoot in RAW for better post-processing flexibility
5. Shooting Techniques
Single Long Exposure Method:
This method involves a single exposure with a very long shutter speed (30 minutes to several hours).
-
Set the camera to Bulb Mode.
-
Use a remote shutter release to minimize vibrations.
-
Monitor the battery life, as long exposures drain power quickly.
Stacking Multiple Short Exposures (Recommended):
Instead of one long exposure, shoot multiple 30-second images and stack them in post-processing.
-
Use an intervalometer to shoot continuously for 1-3 hours.
-
Stack images using software like StarStaX or Adobe Photoshop.
-
Reduces noise and avoids overexposed images.

6. Post-Processing Tips
Editing star trails enhances their visibility and removes unwanted noise.
Recommended Software:
-
Adobe Lightroom: Adjust contrast, shadows, and clarity.
-
Adobe Photoshop: Use the blending mode to stack images.
-
StarStaX: Specializes in stacking star trail images for smooth results.
Editing Steps:
-
Import and select the best images.
-
Adjust contrast and sharpness in Lightroom.
-
Stack images in Photoshop or StarStaX.
-
Apply final touches like color correction and noise reduction.
7. Additional Tips for Stunning Star Trails
-
Include Foreground Elements: Mountains, trees, or buildings add depth.
-
Use the North Star (Polaris): Creates circular star trails when framed properly.
-
Experiment with Different Angles: Try vertical and panoramic compositions.
-
Shoot in RAW: Provides better editing flexibility.
-
Be Patient: Star trails require time, so plan accordingly.

Conclusion
Star trail photography is a rewarding experience that requires careful planning, the right settings, and patience. By using tools like Photo Expert for location tracking, light pollution mapping, and Moon/Sun event planning, along with MIOPS Smart+ for automation and Snap Pro Camera App for iPhone users, you can capture breathtaking images of the night sky.
Now, set up your gear, find a dark sky, and start capturing the magic of star trails!