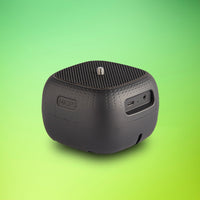
The following article is not just a quick review, because in the past six months, in addition to detailed testing, I also had the opportunity to discover all the panoramic photography potential of the CAPSULE PRO with individual developments.

Since I have been engaged in panoramic photography, I have been interested in automated panoramic heads. I have looked at almost every product available on the market, and the idea of a unique design also crossed my mind. I had several motorized panoramic heads, but there was always too much compromise. I've been looking for a lightweight, modular, and easy-to-use product ever since.
This is why I paid attention to motorized time-lapse rotators, which can easily be used to build an automated panoramic head. At the end of 2022, I bought a Capsule360 to test my vision with a traditional panoramic head. After that, I contacted MIOPS that I would like to write a more serious article about the new Capsule Pro in terms of panoramic photography. The company supported my idea and sent me two new Capsule Pro and a MIOPS L-bracket Pro in early 2023.
Versatile pan and tilt head for time-lapse, multi row panorama, 360 product photography and videography.
MIOPS CAPSULEPRO
Basically, an automated panoramic head requires only two motorized rotators (Pan & Tilt) and an L-bracket. However, since the main profile of these products is more time-lapse and other video content, their panoramic head accessory is difficult to meet the expectations of a professional panoramic photographer.

In the picture above you can see three different types of MIOPS L-bracket, their shortcomings are as follows:
- stability and accuracy (bent thin, unbraced L-shaped plates bend from the weight of the photographic equipment, resonate when moving and taking pictures)
- their customization is limited, so they cannot be calibrated for every camera+lens set
- full 180° vertical rotation is not possible with larger camera and lens combinations.
- the landscape orientation of the camera position is necessary in many cases, but it increases the length of the power arms on the L-bracket and thus also the load on the motors. This is one of the reasons why portrait orientation is more common during panoramic photography.
Regardless of all this, MIOPS L-bracket Pro works great for time-lapse shots and videos, as well as for shooting simple panoramas. A lightweight accessory with good mounting and fastening mechanics for two-axis movement.
In my opinion, when it comes to panoramic photography, there is much greater potential in Capsule Pro. This, however, requires a more well-thought-out L-bracket, which is structurally closer to the design of traditional panoramic heads.
Since there are quite a few simple and modular L-plates on the Internet that I also have, I started building from them in the first place. The image below shows the very first version.

Although it worked quite well, I was not entirely satisfied with it. I started studying the MIOPS L-bracket Pro, because placing the Tilt motor on the other side was a really good idea:

I wanted to transfer this solution into my version of L-bracket, but this required more serious planning and manufacturing. Finally, the following custom-made parts were added to my improved panoramic head:

In this case, the Tilt arm is just a simple macro rail, which has also got some modifications. Of course, there are other panoramic heads that contain such macro rails, but in this case I only chose them because of their simplicity and thinness.

After the production of special accessories, let's see what components my panoramic head for Capsule Pro consists of. Of course this is only one concept among many, and it’s also just a quick presentation. Within this line, it is possible to design a completely new product or to expand the function of an already existing product with only a few additional components.

Since the rotating part taken from the MIOPS L-bracket has been placed on top of the vertical Arca Swiss Plate, the Tilt Capsule Pro is a little higher than necessary. This is of course useful in many cases, but it would still be better to create a shorter or adjustable version.

Let's see how the panoramic head looks with some photographic equipment. The picture below shows a combination of a Nikon D5100 type DSLR camera body and a Nikkor AF 85mm f1.8D lens.

This version supports portrait-oriented camera mounting in this form, but a landscape-oriented MIOPS component can also be easily connected to this design.
This type of panoramic head construction has the following advantages:
- The head can be adjusted in the direction of both axes, so the nodal point can be calibrated for many more camera+lens combinations within certain limits.
- Stability and accuracy
- The possibility of making a full spherical panorama
- It can be disassembled quickly and easily, so it takes up less space for storage and transport.
- In portrait position, the camera puts less strain on the Tilt motor, leaving more power for movement.
Now let's see the practical examples, because in the last six months I managed to test the panoramic skills of the Capsule Pro in really special locations.
Depending on the conditions and the amount of images, a panorama can even be taken with some manual panoramic head. However, if the camera is located at a height that is difficult to reach, the use of an automated head is already indispensable. When creating high-resolution, so-called gigapixel panoramas, especially in the case of interior spaces, it is necessary to position the camera vertically in the center of the space too. Without that, it’s almost impossible to adjust the focus in all directions properly.

Technical details of photography:
-
Camera: Nikon D5100 (16MP) - Sensor: Crop
-
Lens: Nikon AF-S 35mm f/1.8G - Focal Length: 35
-
Camera orientation (Layout): Portrait
-
Camera height: 4m
-
Aperture: f16
-
Shutter Speed (0EV): 1/2s
-
ISO: 250
-
Exposure bracketing: 0EV, -2.0EV, +2.0EV (for HDR)
-
Total photo: 399
-
Total shooting directions: 133
-
19 column and 7 row - Overlap: 30%
-
Total shooting time: about 30min
-
Panorama size: 48.000 x 24.000 pixel (full 360° x 180° spherical type)
With the Capsule Pro, it’s possible to use Exposure bracketing to create HDR panoramas. The desired bracketing values and the continuous shooting mode must be set on the camera. In the MIOPS application, you only need to make sure that the exposure time is set to a value that covers the duration of recording the entire bracketing series.
![]()
Click on the picture to view the end result
2.) Library of ELTE - Budapest (Hungary)
In the huge interior of ELTE's (Eötvös Loránd University) library, the angle of view of the 50mm prime lens worked perfectly. With a higher resolution full-frame camera, fewer images could have been used to create an even higher resolution panorama.

Technical details of photography:
-
Camera: Nikon D5100 (16MP) - Sensor: Crop
-
Lens: Nikon AF-S 50mm f/1.8G - Focal Length: 50
-
Camera orientation (Layout): Portrait
-
Camera height: 6m
-
Aperture: f16
-
Shutter Speed (0EV): 1/2s
-
ISO: 400
-
Exposure bracketing: 0EV, -2.0EV, +2.0EV (for HDR)
-
Total photo: 840
-
Total shooting directions: 280
-
28 column and 10 row - Overlap: 30%
-
Total shooting time: about 45min
-
Panorama size: 70.000 x 35.000 pixel (full 360° x 180° spherical)
3.) Hungarian Parliament at night - Budapest

In this case, in the panorama menu of the MIOPS application, the area to be recorded must be narrowed down by setting the starting (A) and ending (B) points. If we only use one Capsule Pro, we only have the option of horizontal movement, but with two rotators we can already calibrate for two-axis shooting.

Technical details of photography:
-
Camera: Nikon D5100 (16MP) - Sensor: Crop
-
Lens: Nikon AF 85mm f/1.8D - Focal Length: 85
-
Camera orientation (Layout): Portrait
-
Aperture: f11
-
Shutter Speed: 3s
-
ISO: 100
-
Total shooting directions: 20
-
10 column and 2 row - Overlap: 30%
-
Total shooting time: about 3min
-
Panorama size: 27.243 x 15.325 pixel
4.) Pappas Auto Showroom - Budapest (Hungary)
However, accuracy and speed are always very important factors. The Showroom of Pappas Auto contained a lot of reflective surfaces, so before each exposure the photographer had to hide and then return to the camera again due to the manual rotation of the panoramic head. The single Capsule Pro used during the photography made the job very easy, and the bracketing image sequences were completed perfectly.

Technical details of photography:
-
Camera: Nikon D850 (45MP) - Sensor: Full Frame
-
Lens: Nikon AF Fisheye 10.5mm f/2.8G ED (shaved hood) - Focal Length: 10*
-
Camera orientation (Layout): Portrait
-
Aperture: f11
-
Shutter Speed (0EV): 1/50s
-
ISO: 800
-
Exposure bracketing: 0EV, -4.0EV, -2.0EV, +2.0EV, +4.0EV (for HDR)
-
Total photo: 20 / panorama
-
Total shooting directions: 4 / panorama
-
4 column - Overlap: 30%
-
Total shooting time: 13sec / panorama
-
One panorama size: 13.000 x 6.500 pixel (full 360° x 180° spherical)

Click on the picture to view the end result
5.) White Raven Skybar - Budapest (Hungary)
Since this contains the most shooting directions of all the panoramas in this article (352 pieces), I tested the accuracy of the Capsule Pro’s using a unique scaling method. Because the so-called Papywizard panorama shooting code, which gives the position of each image, is always very helpful for the stitching softwares to create gigapixel panoramas, consisting of many images. However, this code (XML file) only works properly, if the automatic head accurately performs the specified 360-degree horizontal and 180-degree vertical rotation. During the scaling test, it was revealed that even when photographing the entire sphere, it managed to keep the exact positional values along both axes.

Technical details of photography:
-
Camera: Nikon D850 (45MP) - Sensor: Full Frame
-
Lens: Nikon AF 85mm f/1.8D - Focal Length: 85
-
Camera orientation (Layout): Portrait
-
Camera height: 7m
-
Aperture: f14
-
Shutter Speed: 1/1000s
-
ISO: 500
-
Total shooting directions: 352
-
32 column and 11 row - Overlap: 30%
-
Total shooting time: about 32min
-
Panorama size: 122.500 x 61.250 pixel (full 360° x 180° spherical)
Another big positive of the Capsule Pro is the battery life. This gigapixel panorama sequence consisting of more than three hundred images consumed only 8% of the available battery power.
![]()
Click on the picture to view the end result
Summary
I think the Capsule Pro really has the potential to be taken seriously by the panorama photographers, even though it's a time-lapse specific product. Of course, there is still room for improvement in terms of hardware and software, but its versatile potential is simply undeniable.
I would like to thank MIOPS for making their products available to me and for being completely open to new ideas and technical suggestions.
Last but not least, I would like to thank my dear wife, who contributed to the success of panoramic photography with her devoted patience and professional assistance.
About the Author
An adept 3D Artist and Photographer, Attila Farkas (Facebook: @photoreal360) harbors a deep passion for spherical panorama photography and the creation of virtual tours. Every day, he's driven by the goal to craft something beautiful, to master a new skill, and to persistently tackle challenges, even if they seem insurmountable.
In his profession, Attila frequently faces situations that challenge his expertise. While he relishes the triumph of finding a solution, he finds equal, if not greater, joy in sharing his amassed knowledge with others. This is the very reason for the existence of this blog. If Attila Farkas has managed to simplify the task for even one individual, he believes his effort has been worthwhile.


