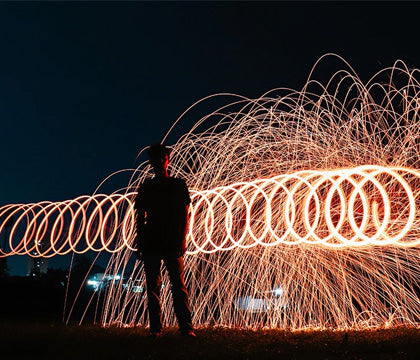
A long exposure time-lapse is a time-lapse in which every photo is exposed for a certain amount of time to create special movement in the photo with an artistic feel. Everything that moves like cars or clouds create a motion blur. Long exposure time lapses work especially well at night since you don’t need to use any Neutral Density Filter too not overexpose the image.
A long exposure time-lapse normally occurs over several minutes or even hours, depending on how long your exposure is set too. But how do you shoot a perfect long exposure time-lapse? You may ask since most cameras don’t have time-lapse modes built into them and even if they have it, it’s minimalistic and doesn’t let you do a lot. This is where MIOPS comes and shines.
What Do You Need to Shoot a Long Exposure Time-lapse?
To shoot Long Exposure Time Lapses you will need following Equipment.
Camera – The most important thing you will need is a camera. Doesn’t really matter what kind of camera as long as MIOPS camera trigger or camera remotes are supporting your camera.
Lens – Many would argue that the lens or glass as we also call it is more important than the camera itself without good glass your image only looks half as crisp, but as with the camera it doesn’t really matter what lens you use.
Tripod – As with all the other equipment it doesn’t really matter what tripod you use or if you put your camera on a bench or a rock as long as it doesn’t move or get shaken around. So, a tripod isn’t a bad idea.
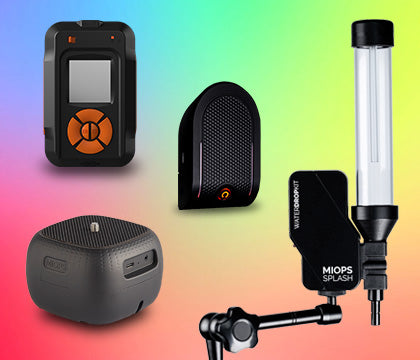
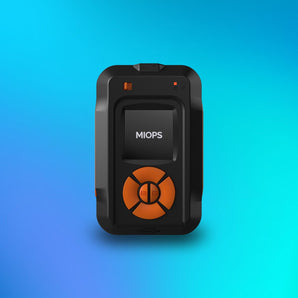
Intervalometer – Doesn’t matter if it’s the MIOPS Smart, MIOPS Mobile Remote or MIOPS Mobile Dongle. You just need the app to configure the time-lapse.
You will also need a lot of patience waiting for your time-lapse to finish. If you’re shooting in cold weather don’t forget to put warm clothes on because you won’t be moving for some time.

MIOPS SMART+
Take impossible photos by turning your camera into a high-speed capture device!
Camera Settings
This will vary completely for your shooting situation. But for the example in this article I shot at:
Camera Mode: Manual (Shutter Priority Mode Speed works as well)
Aperture: F/22 – with ND4
Shutter Speed: 15s
ISO: 800
Focus: Manual
I would always recommend shooting in Manual (M) or Shutter Priority Mode (S). The reason behind that is that you get so much more control over your camera. Neutral Density Filters (ND Filter) help a lot in a bright situation or where there is a lot of light like in the middle of the city. For shooting long exposure time-lapses during the day you will need extremely strong Neutral Density Filters such as a 1000 ND, which is really strong and basically black when you look through it.
Why Do We Shoot in Manual Mode?
This really depends on your Camera Maker, I shoot with Sony Cameras and so I need to shoot in Manual mode for MIOPS Triggers to work but it also helps in Situations where your Focus can change whilst shooting if someone passes by your Camera or something is close to it and it changes Focus from what you wanted to have in Focus in the first place.
The 180 Rule is completely irrelevant in a Long Exposure Time-lapse, so you don’t need to use it whilst shooting a Long Exposure Time-lapse.
Work Flow From Start to Finish
So before I do anything or even go outside I choose a location I want to shoot at and I do some research on good spots and look around Instagram from that location to see what kind of cool spots there are, Instagram is a really helpful tool to find cool photography spots in an unknown location or even if you know it really well you can always find hidden gems. After my initial research and me already know about where I would like to set up my camera I go to the spot preferably 30-60 Mins before I effectively want to start shooting, so if you want to shoot the sunset you should be at your location 30-60 minutes before to set up your shot perfectly.
When arrive I first check out the location and everything around that to maybe find a better spot that I first didn’t notice, when I found the right spot with the frame I want I start setting up. I first set up my tripod then check if it’s sturdy and won’t move at all. I then set up my camera on the tripod and put on any filters I need like ND Filter or polarizer. I set up the shot how I want and then use the MIOPS to start the time-lapse.
In my example, I used a shutter speed of 15 seconds with an interval of 5 seconds. I set the correct shutter speed on my camera and do any other adjustments, aperture, ISO and focusing on the object I’m concentrating on. I find it really important that there is a subject in front to give some depth to the video in the end. I then calculate how long I want the time-lapse to be. So, 24 frames equals 1 Second, so as an example for a 10 second time-lapse we multiply the duration of the time-lapse video (10 Seconds) by the frames (24) which equals 240 frames.
And now you wait… The longer your exposure and your interval is the longer you will have to wait, so you can read a book or enjoy your surroundings without losing sight to your camera.
Once you’re finished shooting you get home and have all these separate frames, what do you do with them? Well, here is my personal workflow on how to edit these images and create a video out of them.
Step one: First thing I do is importing the photos into Lightroom CC, where I then look through all of the images and delete the ones that are not good.
Step two: I start editing the first image in this instance I used one of my presets which soon will be available on my personal website. Lightroom has a really cool feature to edit a lot of images at the same time. You choose the image you have already edited, and you then choose all of the other images and synchronize them to the image you have already edited. I synchronize all the images and then lightly tweak each of them. Once done, export the photos as JPEG’s into a separate folder.
Step three: Open your video editing software, in this case, it is Premiere Pro for me. Import the photos you just exported from Lightroom and sort them by name, so you have an order. You then select all the files and put them on your timeline. You could then nest them and tweak the speed if necessary. If you don’t want to add anything else, you can proceed with exporting the video.
Step four: Congratulations you’ve finished your first long exposure time-lapse and are now ready to show it to friends & families or post them on social media. Feel free to tag me on Instagram @jeremyfuchs and I will check your time-lapses out.
I just wanted to say thank you if you’re reading this far, you’re amazing. 
Related Article: How to Start with Time Lapse Photography?
About the Author
Jeremy Fuchs is a freelance videographer & photographer that shoots almost everything from concerts, music videos, promotional videos to destination weddings and even travel videos.
For more information about Jeremy or contacting him, you can visit his personal website or follow at Instagram @jeremyfuchs
You can also find some of his videos on YouTube channel if you would like to learn more about photography or videography.


